Getting organized is a whole lot easier when every drawer, shelf, and storage bin has a clear place and purpose — and a label maker is one of the simplest tools to make that happen. Whether you’re dealing with overflowing closets, a chaotic garage, or kitchen cabinets that never stay in order, using a label maker helps bring structure to your home in a way that actually lasts. Once everything is labeled, you don’t just clean up once — you create a system you can stick to day after day.
This guide walks you through the most effective ways to organize your house with a label maker, from choosing the right machine to building long-term systems for every room. We’ll cover the best materials to use, strategies for creating labels that won’t peel or fade, and practical ideas for simplifying storage in your kitchen, garage, bathroom, and beyond. Whether you’re new to labeling or looking to refine your setup, these steps will help you turn your label maker into one of the most powerful organizing tools in your home.
This article contains Amazon Associate links. As an Amazon Associate, we earn from qualifying purchases at no additional cost to you.
Choosing the Right Label Maker
Before you can organize anything, you need the right label maker for the job. The best choice depends on how you plan to use it—light home organization, full-garage labeling, office workflow, or a mix of everything. Handheld label makers are great for quick labels around the house, while Bluetooth/app-based models offer cleaner designs, multiple fonts, and easier typing. If you want maximum durability or you’ll be labeling in a workshop environment, a desktop or heavy-duty unit may be the better fit.
Think about practical considerations like tape width, battery life, label durability, and how easy the interface is to use. Do you need waterproof or tear-resistant tape? Will you be making long labels for shelves or small labels for hardware drawers? Do you want icons, barcodes, or QR codes? Taking a moment to match the label maker to your actual needs ensures you won’t feel limited later—and it sets the foundation for an organized system that can grow with your home.
For a do-it-all label maker, we really like the Brother P-Touch.
For an even deeper dive, make sure to check out our full guide on choosing the right label maker for every use.
Creating a Labeling System That Actually Works
A good label maker can only do so much—your system matters even more. The goal is to create a labeling approach that’s consistent, readable, and easy to maintain, no matter which room you apply it to. Start by choosing a naming convention you’ll use everywhere. For example, decide whether you’ll use singular or plural forms (“Sock” vs. “Socks”), whether everything gets a short clear name (“Phillips Bits”) or a more descriptive version (“Impact-Rated Phillips Bits”), and whether certain areas get a category label on shelves in addition to labels on containers. The more uniform your choices are, the easier it will be to navigate your home later.
Next, think about clarity and legibility. Use label sizes that match the container—large bins should get wide, high-contrast labels, while smaller drawers can use a thinner margin setting. Avoid decorative fonts and stick to clean, bold options that are quick to read from a distance. Icons or symbols can be helpful in kids’ rooms or shared spaces, but use them sparingly so they don’t become visual clutter. And finally, don’t label things that don’t need labeling; “over-labeling” makes your system harder to maintain. Focus on the categories and areas that truly benefit from added clarity, and your whole home will feel more organized as a result.
As with everything else in life, if a labeling system is too complicated or too demanding, it may fall by the wayside — so our recommendation is to follow the KISS principle…
Labeling Storage Bins, Totes, and Containers
This is our favorite way to use a label maker, because nothing will make you seem like a god of organization more than a neat, well-labeled storage area.
Labeling your storage bins and containers is one of the quickest wins in home organization because it eliminates the guesswork every time you need something from the garage, pantry, attic, or closet. Start by choosing labels that are large enough to read from a distance—especially for garage totes, seasonal bins, or anything stored high on shelves. High-contrast combinations like black-on-white or white-on-clear tend to be the most readable and look clean across different types of containers.
Placement matters just as much as the label itself. For stacked totes, always label the front and the side so you can still identify what’s inside even if containers shift. In the pantry, place labels on the upper third of jars or canisters so they remain visible even when packed close together.
If you use bins for long-term storage (holiday gear, camping supplies, keepsakes), consider using slightly larger tape widths—¾-inch or 1-inch—so labels stay visible and legible even after years of use. With a consistent labeling style across all your containers, you’ll create a system that feels intuitive and saves time every time you go searching for something.
If you need suggestions on which bins might suit your needs the best, we’ve got you covered. Check out our posts on the best bins for every use case:
- The Best Storage Bins for Camping Gear
- Sterilite Drawer System for Every Use Around the House
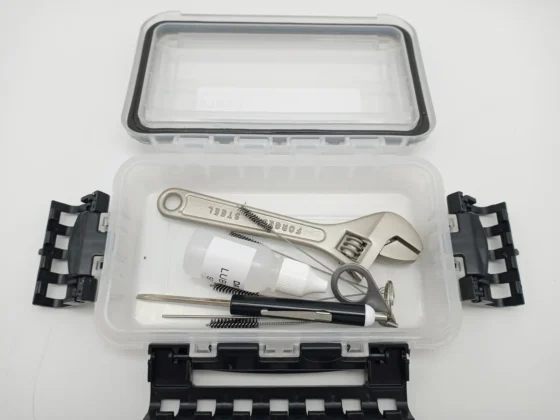
- Small Parts Organizers
- Made in USA Akro-Mils bins for the house and shop
Organizing Your Kitchen and Pantry With a Label Maker
The kitchen is one of the most satisfying places to organize with a label maker because small improvements make a huge daily difference. Clear, consistent labels help you instantly spot ingredients, reduce duplicate purchases, and keep your shelves and drawers from sliding back into chaos. Start by labeling the staples you reach for most often: flour, sugar, rice, pasta, spices, and oils, and definitely check out our article on the best ways to organize your spices if you haven’t already.
Choose a tape color and font style that’s easy to read at a glance—high-contrast black-on-white or white-on-clear works especially well on jars and pantry containers. If you decant ingredients, labeling both the front and lid can save time, especially for items stacked or stored deep on shelves.
Labels also help maintain order behind the scenes. Use larger labels for shelves like “Baking,” “Snacks,” “Canned Goods,” or “Meal Prep,” so the whole family knows where items belong. In drawers, label organizers or dividers for utensils, cookware lids, and meal-prep tools. We keep our flour, sugar, and other messy things in dedicated plastic locking containers like these, and neatly label them accordingly.
While it might be a bit overkill, leftovers become less mysterious when containers have a place—and a date—clearly marked. With a little consistency and a label maker, your kitchen becomes easier to use, easier to clean, and much more enjoyable to cook in.
Streamlining Your Office or Work-From-Home Setup
A label maker can completely transform the way your office or work-from-home space functions. When every cable, drawer, and storage box is clearly labeled, you eliminate the small daily frustrations that slow you down—like trying to figure out which charger belongs to what device, or digging through a drawer to find a single adapter. Start by labeling the essentials: power bricks, chargers, USB cables, external drives, and the cords that run behind your desk. A simple cable tag can prevent a ton of confusion later when something needs to be unplugged or swapped out.
Next, extend labeling to your drawers, tech bins, filing system, and paper archives. Labeling folders and document boxes (our system revolves around several of these Iris boxes for modularity) with clear, readable titles makes it easier to maintain a clean workflow and ensures every item has a designated home. If you use digital-accessory kits—like travel tech bags or spare-parts boxes—label those as well, so you always know where your backups and extras are stored. The goal is to create a workspace where nothing requires searching, guessing, or unplugging the wrong thing. A few simple labels can make your entire office setup feel intentionally designed, faster to use, and far less cluttered.
Before you break out your label maker, though, you’re going to want to make sure you’ve practiced good cable management, and have everything actually ready to be labeled. Check out our quick guide on cable management tips and tricks to help you wrangle those tangles of cords you’ve just been shoving behind your desk.
Closet and Clothing Organization
A label maker can turn even the most chaotic closet into a clean, easy-to-maintain system. Start by labeling the major storage zones: seasonal bins, shoe boxes, shelves, and drawer organizers. Clear, readable labels help you instantly identify where coats, winter gear, off-season clothes, or dress shoes belong, which keeps items from piling up on the floor or getting mixed together. For small accessories—belts, hats, gloves, ties—labels on fabric or plastic drawers make it easy to put things away quickly and find them again later.
Labeling laundry baskets, hamper sections, or linen-closet shelves can also make the entire household more organized. Marking areas for towels, sheets, blankets, and guest bedding helps prevent everything from becoming a jumbled pile. If you have multiple family members sharing the same space, labeling shelves or bins with names creates clear boundaries and reduces clutter. A closet is one of the easiest places for disorder to creep in, and a label maker keeps your system consistent and effortless to follow.
One wise person once said to “set systems, not goals.” While labeling each part of a shelf with the clothes that go there also seems like overkill, in reality, it helps reduce the mental burden of having to remember where each thing goes as you put away your clothes, ultimately saving you time and stress.
There’s a lot of potential here, so we’d like to dive in deeper to closet organization in the future.
Long-Term Maintenance: Keeping Your House Organized Over Time
A labeling system only stays useful if it evolves with your home and your habits (also why we suggested the KISS principle above). Over time, you’ll rearrange rooms, buy new storage containers, change hobbies (or double your collection of fishing gear), or reorganize major spaces like the garage or pantry. That’s why it’s important to check your labels every few months and make sure they still match the way you actually use each space. If you find yourself constantly putting something in the “wrong” bin or ignoring a storage area entirely, that’s usually a sign the label—or even the system itself—needs updating. A few minutes of seasonal maintenance prevents clutter from creeping back in and keeps everything intuitive.
Refreshing labels is also a great opportunity to streamline what you own. When you revisit your storage areas, you’ll naturally spot duplicate tools, expired pantry items, outgrown kids’ supplies, or clothing you no longer wear. Removing that excess makes your labeled system even more effective, because everything left behind genuinely belongs in its assigned place. Think of long-term maintenance as the quiet backbone of your organizational strategy: a small habit that keeps your home efficient, easy to navigate, and far less overwhelming across the years.
The Japanese have a term for this — kaizen.
Final Thoughts: How to Use a Label Maker to Organize Your Home
Getting organized with a label maker isn’t about creating a picture-perfect house—it’s about building a system that helps you stay efficient, find what you need, and keep clutter from creeping back in. Once you choose the right label maker and apply a consistent labeling strategy across your storage bins, closets, kitchen, office, and workshop, the difference is immediate. Suddenly everything has a place, and everyone in the household can follow the same system without confusion.
The best part is that an organized home doesn’t require major renovations or expensive products. A label maker, a clear plan, and a few minutes of upkeep each month are enough to maintain a tidy, predictable space that actually works for your lifestyle. Whether you’re managing tools, pantry staples, kids’ toys, or seasonal storage, a well-designed labeling system brings long-lasting order to every corner of the house.